Crimson Desert Dimensional Labyrinth Abyss Puzzle — Full Path and Solution

The Dimensional Labyrinth is a multi-stage Abyss restoration puzzle in Crimson Desert that combines traversal, Force Palm activation, and Axiom core placement. Players must activate four silver circles scattered across a layered vertical structure to restore blue energy lines feeding into the central Abyss Core. Two rectangular Axiom cores also need to be physically carried and aligned near the Abyss Core before the final activation. Equip grapple and flight abilities before entering, because the puzzle spans multiple elevations with no safe way to skip between them.
Where Is Dimensional Labyrinth on Crimson Desert Map?
The Dimensional Labyrinth sits at the end of a fixed regional sequence: Spire of the Sun, then Nest of Valor, then Throne of Truth, and finally the Dimensional Labyrinth area itself. This is one of several late-game Sanctum puzzles tied to Abyss progression, and reaching it requires clearing the preceding zones in order. The entrance connects to elevated floating structures, so flight and grappling are mandatory just to access the main core section where the puzzle starts.
Dimensional Labyrinth Abyss Path
The puzzle follows a loop through the structure. Players move outward from the central Abyss Core to activate silver circles, collect Axiom cores, and return to the center repeatedly. Activating nodes out of order or skipping a core interaction stalls progress, so sequencing matters.
- Fly to the main core area and activate the first silver circle with Force Palm to unlock the inner structure.
- Enter the building and use Force Palm on the second silver circle to extend blue energy lines deeper into the labyrinth.
- Grapple to the upper platform, locate the third silver circle and the nearby rectangular Axiom cores.
- Use Axiom abilities to move the cores into position near the active mechanism, then activate the third circle with Force Palm.
- Carry both rectangular Axiom cores back to the main Abyss Core and place them carefully to begin central restoration.
- Descend to the lower section, find a safe path down, and activate the fourth silver circle with Force Palm to complete all blue line connections.
- Return to the Abyss Core and use Force Palm one final time to finish the restoration and collect the reward.
The full Dimensional Labyrinth Abyss solution depends on understanding that silver circles and Axiom cores operate as two parallel systems. Silver circles control the blue energy lines through Force Palm, while Axiom cores physically stabilize the central mechanism. Both systems must be complete before the final Force Palm activation at the Abyss Core registers. Missing even one core placement or one circle activation blocks the ending.
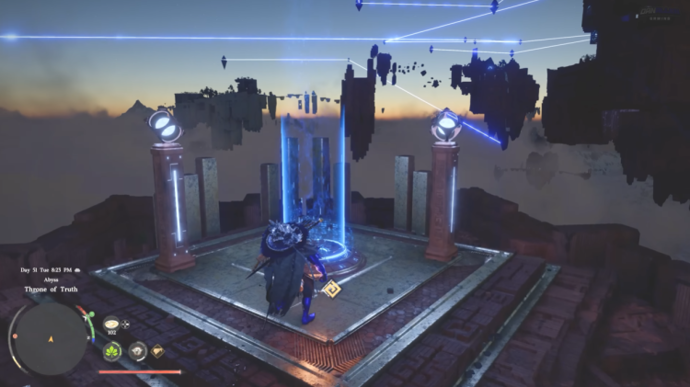
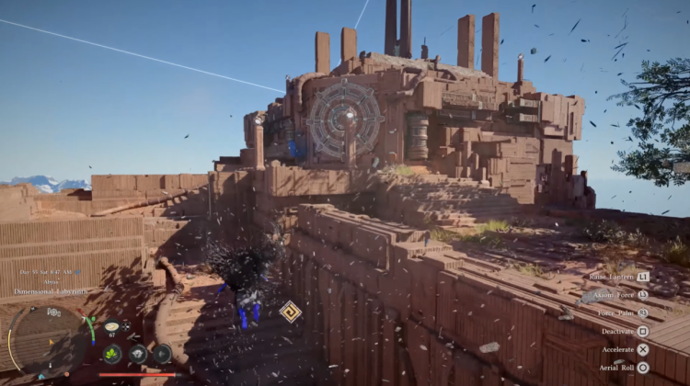
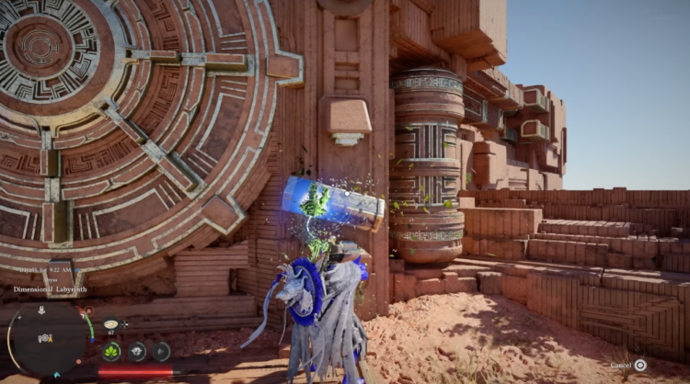
First Silver Circle (Round Gate) and Outer Energy Lines
Fly toward the main core area at the center of the structure. The first silver circle is visible from the approach. Position yourself directly in front of it and use Force Palm to trigger the initial blue energy lines. These lines unlock access to the inner building where the rest of the puzzle takes place. Without this activation, the interior remains sealed.
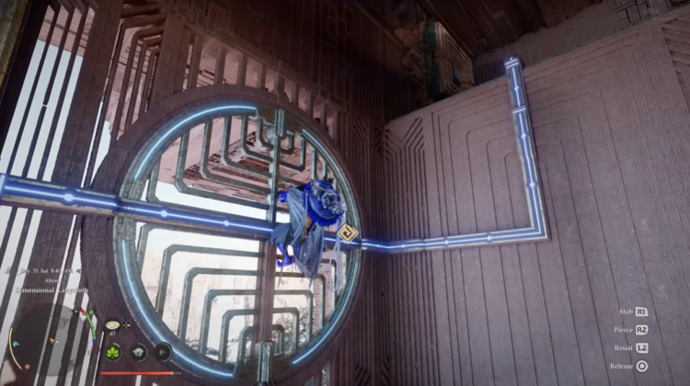
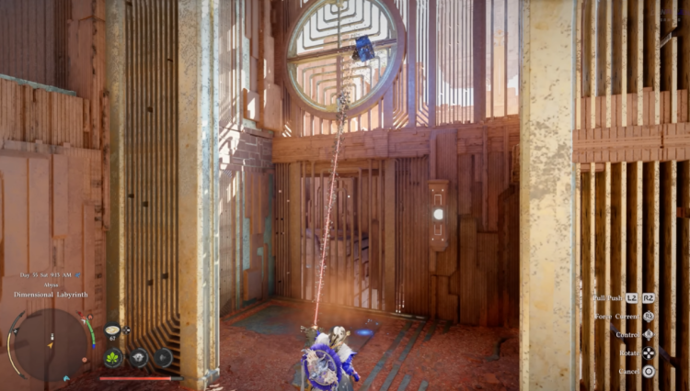
Second Silver Circle (Round Gate) Inside the Building
Enter the building through the newly opened access point. The second silver circle is inside, on the same level. Use Force Palm again to activate the next set of blue lines. This extends the energy network further into the labyrinth and opens vertical pathways to the upper and lower sections. I think this step is where most players start to understand how the puzzle loops back on itself, because the energy lines visibly connect to areas you can already see above and below.
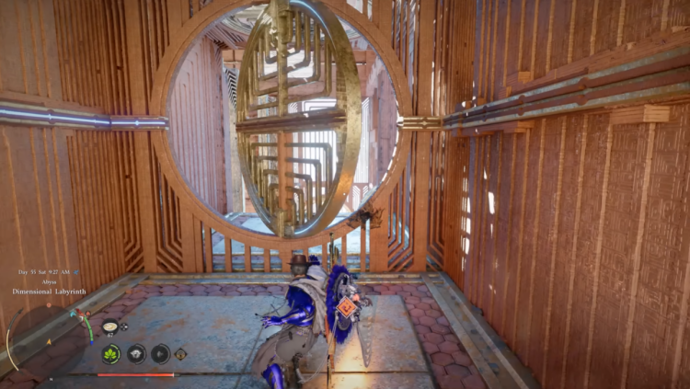
Grapple to the Upper Platform
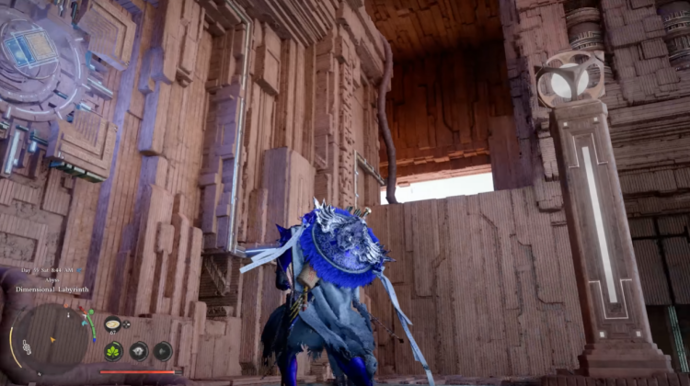
Use your grapple to reach the higher platform above the second circle. Positioning matters here. A bad angle on the grapple wastes time and can drop you back to the lower level. Once you land on the upper platform, search for the third silver circle. It sits near key puzzle components, specifically the rectangular Axiom cores that become critical in the next steps.
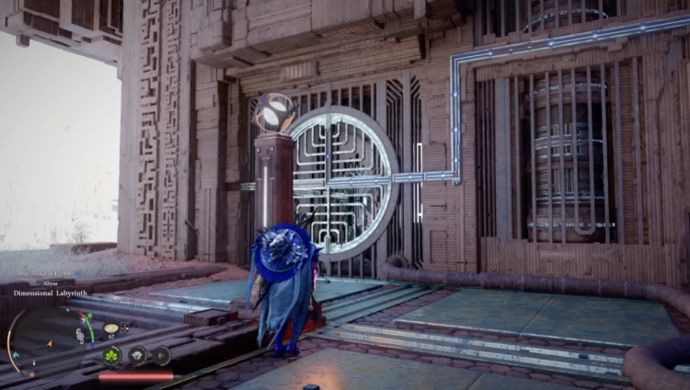
Move the Axiom Cores Into Position
Two rectangular Axiom cores sit near the third node. These are physical objects that must be picked up and repositioned using Axiom abilities. Move each core close to the active mechanism near the third silver circle. Placement precision matters. If a core is too far from the mechanism, the next activation will not register the stabilization. Align both before proceeding.
Activate the Third Circle and Begin Core Transport
With the Axiom cores in position, use Force Palm on the third silver circle. This triggers the system to eject and lock the cores into a transportable state while completing another segment of the blue energy lines. Now carry each rectangular Axiom core, one at a time, back toward the main Abyss Core at the center of the structure. Place them adjacent to the Abyss Core. This begins restoring the central mechanism, and you will see visual feedback confirming each placement.
Descend to the Fourth Silver Circle
Head to the lower section of the structure. This descent requires controlled navigation rather than a blind drop. Look for a visible path or ledge sequence leading downward. The fourth silver circle is at the bottom of this descent. Use Force Palm to activate it. This completes the final blue line connections across the full structure. All four energy pathways should now display as fully restored, linking back to the Abyss Core.
Final Restoration at the Abyss Core
Return to the main Abyss Core. With all four silver circles activated and both Axiom cores placed, the core is ready for final restoration. Use Force Palm one last time on the Abyss Core itself. This completes the puzzle and awards the Abyss Artifact. I find this last step almost anticlimactic after the vertical navigation and core juggling, but it closes the loop cleanly and confirms that every prior activation registered correctly.
Crimson Desert: Dimensional Labyrinth Abyss Rewards
Completing the Dimensional Labyrinth Abyss restoration grants the following:
- Abyss Artifact, the core reward for full restoration.
- Progression unlock for further Abyss-related exploration.
- Moderate experience gain toward character advancement.
The Abyss Artifact is the main reason to run this puzzle, since it feeds directly into skill unlocks and equipment refinement past +5. The progression unlock also opens access to additional Abyss content in later zones.
More Crimson Desert Guides
Combat in Crimson Desert rewards studying enemy timing before committing to attacks. Shields absorb heavy damage in multi-enemy encounters, particularly in faction-controlled zones where ambush difficulty scales with story progression. Getting shield durability past +5 through Equipment Refinement costs Abyss Artifacts, same as every other high-end upgrade.
Patch 1.01.00 shipped on March 28, 2026, adding five new mounts: Silver Fang, White Bear, Snowwhite Deer, Rock Tusk Warthog, and Icicle Edge Alpine Ibex. Defeat the creature, skin it for materials, then craft a Sigil at a Witch's Altar to register the mount on the radial wheel permanently.
Abyss Artifacts replace experience-based leveling in Crimson Desert. Every skill unlock, stat boost, and equipment push past +5 depends on collecting them through enemy farming or tracking down the 141 Sealed Artifacts scattered across Pywel.

Vitalii Diakiv writes gaming blogs and guides, focusing on the latest announcements and games matched with pop-cultural phenomena. Second, he covers esports events Counter-Strike 2, Marvel Rivals, League of Legends, and others.


 Everything we know about Samson: A Tyndalston StoryEverything we know about Samson: A Tyndalston Story — release date, gameplay, story, and features of Liquid Swords’ intense action game set in a harsh, unforgiving city.
 How to Solve All Sanctum Puzzles in Crimson DesertDiscover How to Solve All Sanctum Puzzles in Crimson Desert — Full Guide to Sanctums, Core Mechanics, and Rewards.
 VRS Ranking Results and the Team List for IEM Cologne Major 2026IEM Cologne Major 2026 teams revealed: NAVI’s historic streak continues, FaZe miss out, and new teams like SINNERS and THUNDERdOWNUNDER make their debut.
 All Crimson Desert Unique Weapons: Stats, Locations, and Build NotesCrimson Desert launches with a full set of unique weapons hidden across Pywel — here is where to find every one of them.
")