How to Solve All Sanctum Puzzles in Crimson Desert

Sanctum puzzles in Crimson Desert are one of the main progression systems that directly affect access to new elements, abilities, and hidden regions. Unlike regular puzzles, each crimson desert sanctum puzzle is a full-fledged quest that combines navigation, combat, and solving sometimes quite complex tasks. In this guide, we will explain how to solve all sanctum puzzles, the completion steps, possible mistakes, and what rewards can be obtained.
What is a Sanctum and Why Complete It
A Sanctum in Crimson Desert is an ancient ruin scattered across Pywel, where you are sent by the witches you encounter. Each of them contains a puzzle that you will need to solve in order to cleanse the sanctuary from evil.
In most cases, a crimson desert sanctum puzzle consists of activating the central mechanism — the so-called CORE — after which access to the next layer of trials is opened. Completing a Sanctum is what allows you to obtain new blueprints, weapons, equipment, and gain access to certain story routes.
How The CORE Puzzle Mechanic Works
Almost every crimson desert sanctum puzzle is based on the universal CORE mechanic. It looks different across locations, but the principle remains the same.
Main stages:
- Activation of the central CORE
- Collecting and carrying energy nodes (blocks and spheres)
- Aligning energy channels
- Defending the mechanism from enemies
- Final synchronization
After entering a Sanctum, the player almost always sees a central structure with several inactive slots. This is the CORE matrix. It does not start immediately — first, you need to find and activate auxiliary blocks. When all the required elements are placed, the final phase begins — usually a wave of enemies or a stabilization timer.
To obtain the Essence of Benediction, use Blinding Flash to direct light onto the central crystal. The ring of gemstones will begin to rotate; flashes of light must be synchronized with the small gemstones, avoiding empty spaces. Press the button once for each gem, slightly anticipating due to the 0.5-second light delay.
Sanctum of Benediction — Step-By-Step Solution
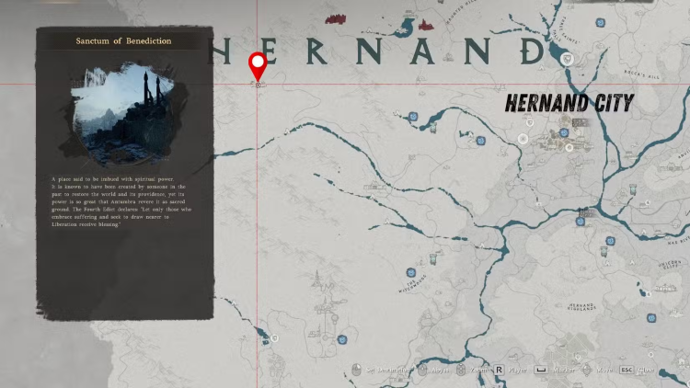
Sanctum of Benediction is one of the first major Sanctums that introduces the player to the full version of the CORE mechanic. This sanctuary is located far to the west in Hernand, high in the frozen mountains, and can only be accessed after starting the quest "Witch of Wisdom". To complete the crimson desert benediction puzzle, you will also need Axiom Force and the Kuku Pot, which you receive during the main storyline.
To cleanse the Sanctum of Benediction, follow these instructions:
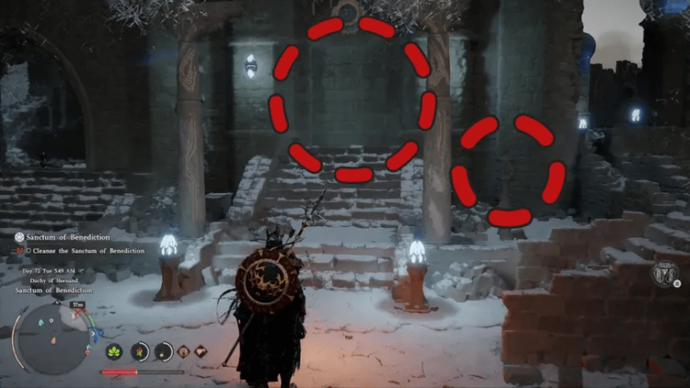
- Find and insert two blocks into the ancient machine in the center of the ruins.
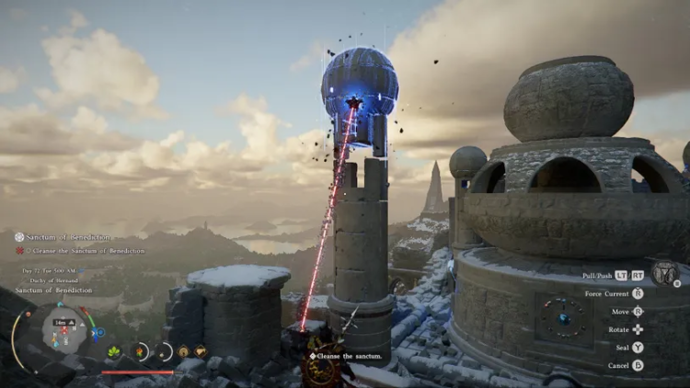
- The first block is part of a column located in a nearby tower; seal it inside the Kuku Pot to carry it out of the room. The second block is a cube-shaped energy cell located in the room immediately to the right. On both sides of the doorway there is a crystal, and inside the room there is a small well. Seal this block inside the Kuku Pot as well.
- There is also a treasure chest in the room containing the Leather Helmet of the Fallen Kingdom, which enhances "Turning Slash" by 35%.
- Bring both blocks to the machine.
- Insert the first block above the north-eastern column, climb onto it, and use Aerial Force Palm to lock it in place.
- Place the second block in the air in front of the western opening of the machine and secure it with the palm. Once placed correctly, the machine will hum, and the sanctuary will be cleansed.
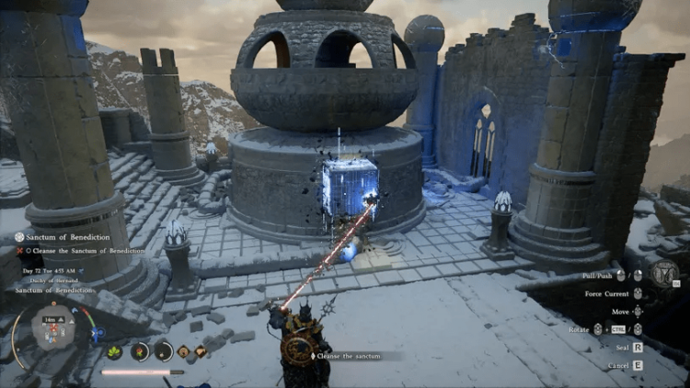
After activation, the panel will shift, and the upper section will release the Core of Benediction, which must be taken using Axiom Force and sealed into the Kuku Pot.
Once you cleanse the Sanctum of Benediction, you will receive blueprints for the Kuku Marni Laser Helmet and move one step closer to completing the "Witch of Wisdom" quest. It is also recommended to read the Crimson Desert Factions Overview to understand which faction will make it easiest for you to solve the puzzles.
Sanctum of Absolution — Full Solution
Sanctum of Absolution is significantly more difficult than the previous one, as in addition to the puzzle you will need to defeat a boss. As with Sanctum of Benediction, access to it becomes available only after starting the "Witch of Wisdom" quest. Sanctum of Absolution is located high in the frozen mountains, so bring Ice Resistance, with at least level 5 recommended to avoid receiving a stamina debuff. You will be transported there by the Frostcursed Plate Cloak, which can be found in the Sanctum of Absolution.
- First, free the Sanctum from Antumbra. Destroy all enemies around before fighting the Sword of Antumbra. Use Focused Vision to block attacks, and a barrage of Force Palms to deal significant damage. When you are stunned by the Sword of Antumbra, apply Turning Cleaving Strike, then continue a series of strong attacks. Bring food to restore health and spirit, such as chewy rice cakes or meat and vegetable porridge.
- After the fight, activate the machine on the southern side of the Sanctum. The first block is located in the room with a fire trap north of the machine. Turn left to avoid the trap, find the block in the adjacent chamber, and seal it into the Kuku Pot. The second block is located on the opposite side of the ruins, through the doorway near the location of the fight with the Sword of Antumbra. Break the pots along the path to find the block and seal it into the Kuku Pot.
- Bring both blocks to the machine. Insert the first block above the column, climb onto it, and use Aerial Force Palm to lock it in place. Place the second block near the opening on the eastern side of the furnace and secure it using Force Palm. After placement, the machine will hum, and the sanctuary will be cleansed.
After activation, the panel will shift, and the upper section will release the Core of Absolution, which must be taken using Axiom Force and sealed into the Kuku Pot. Once you cleanse the Sanctum of Absolution, you will receive blueprints for the Enhanced Kuku Pot and the Kuku Spear.
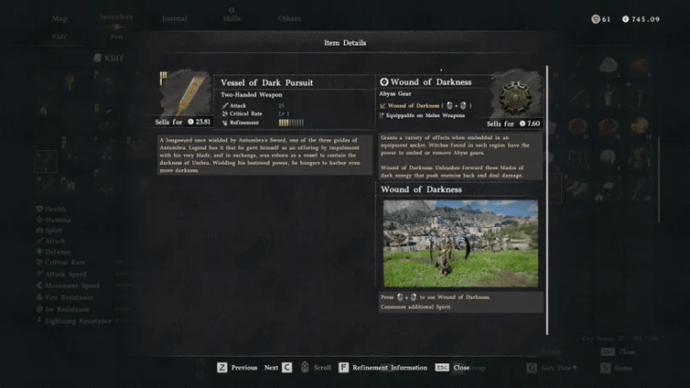
When you defeat the Sword of Antumbra, you will receive The Vessel of Dark Pursuit, an impressive two-handed sword with a powerful Abyss Gear called Wound of Darkness. It grants the wave attack of the Sword of Antumbra to any weapon you insert it into.
Azure Moon Labyrinth — Guide
Crimson Desert Azure Moon Labyrinth is one of the most difficult navigation-type puzzles. Unlike classic Sanctums, spatial orientation plays the key role here.
The Azure Moon Labyrinth Ruins are located approximately 1050 meters southwest of the city of Hernand in the northern part of the Witchwoods. If you follow the southwestern road from the city of Hernand across three rivers, you will arrive in the Witchwoods area. You are looking for the Foniel Ranch, where a gang of bandits resides. Destroy them to begin the exploration.
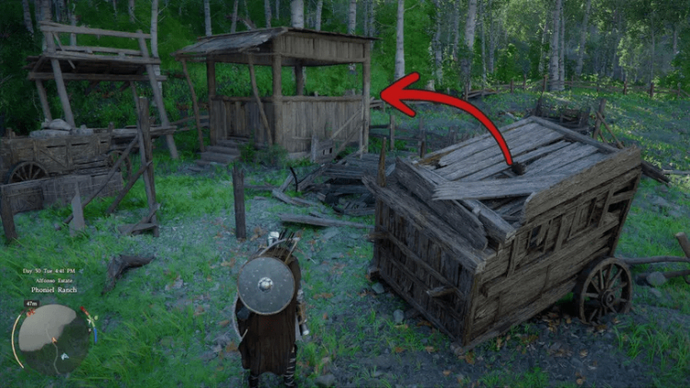
At the southern end of the ranch there is a small hut with stairs leading downward into the Labyrinth. There is only one path downward, and it is filled with traps, including flame jets and spike pits. The puzzle is located at the bottom section. If you want to play hardcore, you will need to run across half the map to find the correct symbols on trees and place the corresponding blocks, but we will simplify the process and explain which symbols you need to set.
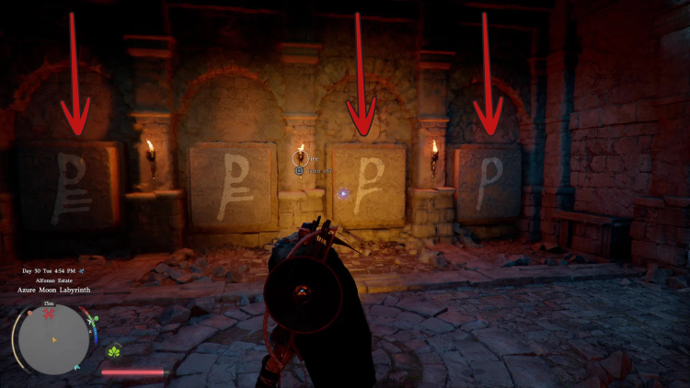
To activate each block, you need to strike it with a Focused Strike and guess the correct symbols (without touching the wrong blocks):
- Symbol P
- Symbol P with an additional line
- Symbol P with three additional lines
- Symbol F
- Symbol F with one additional line
The correct solution will lower the gate blocking the path to the Abyss Cresset and open the secret door behind it. You will receive an Abyss Artifact and an Abyss Cresset, and a key item called the Memory of Tide, using which opens eight caves hidden behind waterfalls.
Screaming Vault Ancient Ruins — Solution
Screaming Vault Ancient Ruins differs from standard Sanctums. Just like Azure Moon Labyrinth, the solution lies outside the vault itself, but instead of being drawn on trees, it is shown on scarecrows.
The Screaming Vault puzzle consists of three wheels displaying three different patterns, and your goal is to rotate them to display the pattern in the correct position.
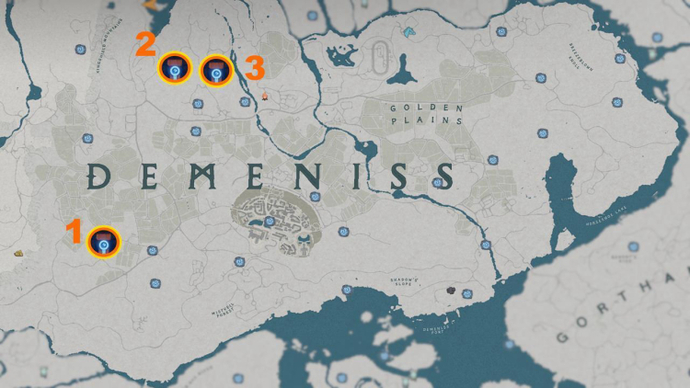
The patterns you need — and their desired placement — can be found around Demeniss, and you will need to use the map found in the Screaming Vault to track them, fortunately they are not far from the puzzle itself.
Here are the three patterns that need to be recreated in Screaming Ruins:
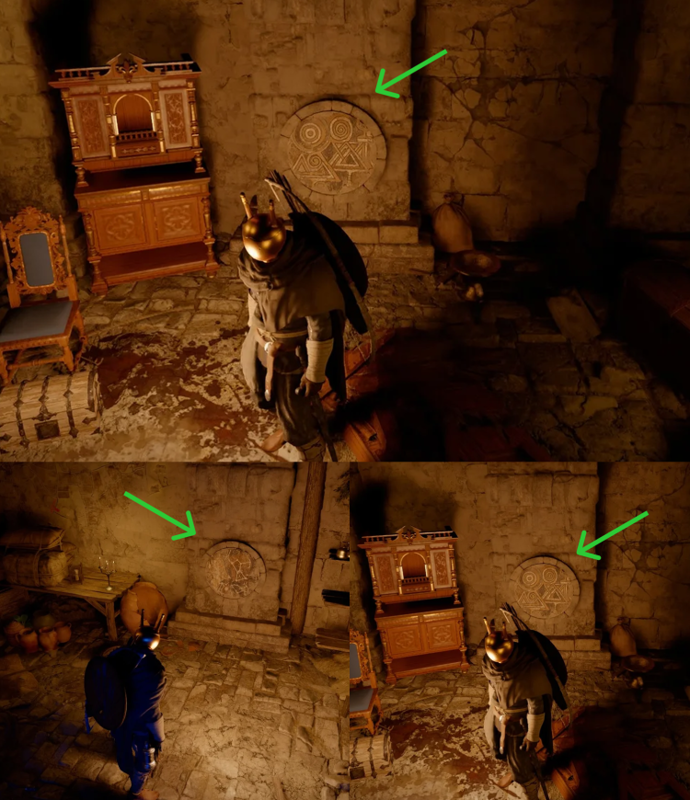
The Screaming Vault puzzle is located directly west of Demenis Castle, between Rustleleaf Farm and the abandoned ruins.
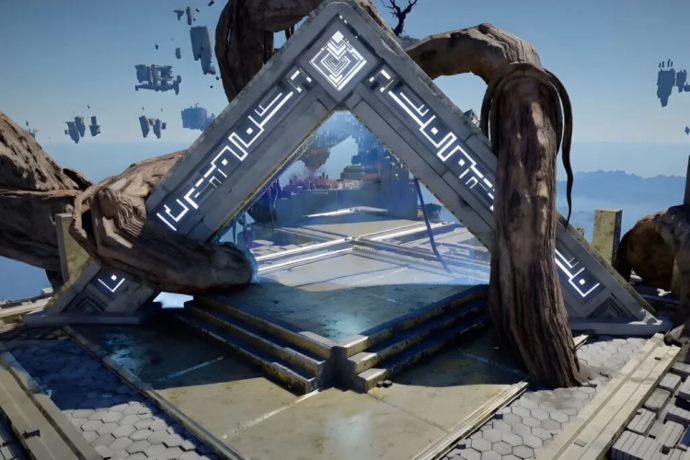
Crescent Skybridge Abyss — Walkthrough
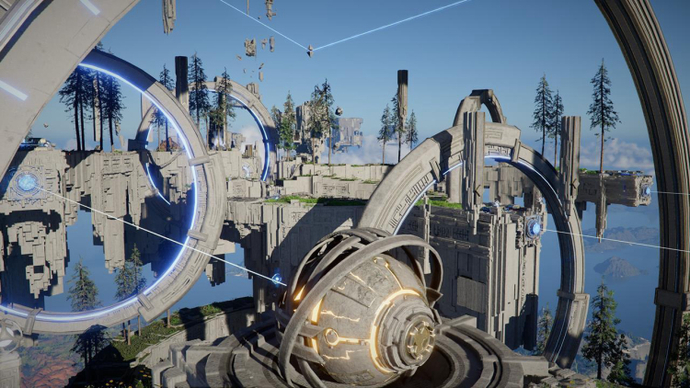
Crescent Skybridge Abyss is one of the key Abyss trials where movement mechanics across the bridge and synchronization with energy nodes are critically important.
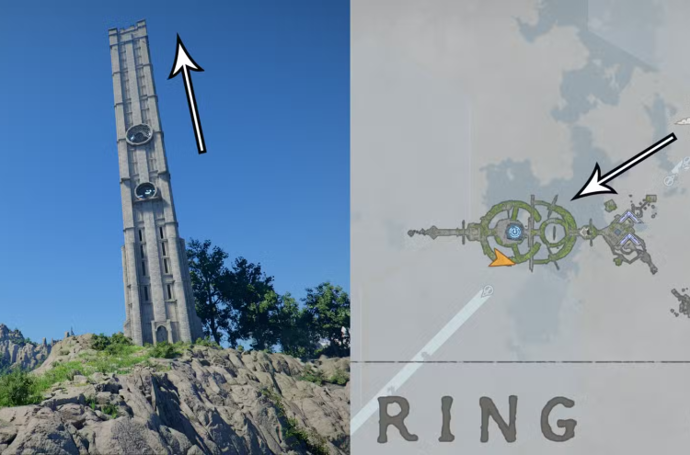
The Crescent Skybridge is part of the Triangle Ring Abyss above Demeniss. At the end of Chapter 5, the quest "Toward the Nest " will send you after a villain named Crowcaller, and you must cross the Crescent Skybridge to reach him. Activating the Spire of Soaring will unlock a floating platform that will carry you to the Crescent Skybridge.
Instructions for completing this puzzle:
- Activate the abyss nexus teleport point.
- Climb the wall with the blue circle (western side), then climb the wall to the right to reach the highest level of the bridge. Use Force Palm or enhanced Axiom Force for additional elevation.
- At the top, be careful of the glowing blue flowers — they drain health.
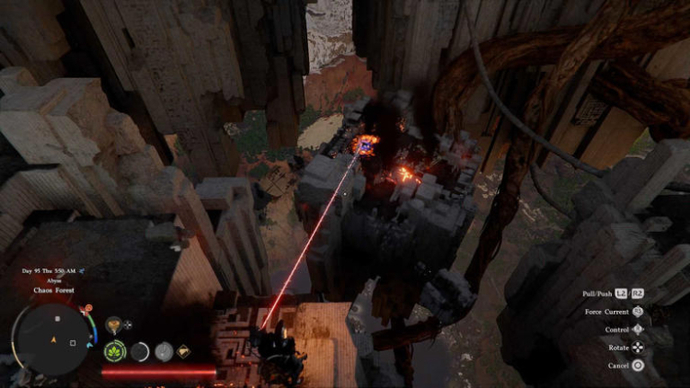
- On the platform, adjust the two spheres on the north-eastern and south-eastern edges so that their lasers change targets from orange to blue. Use Axiom Force on the back of the spheres to redirect the beam.
- Move to the eastern section of the bridge, find two electrical wiring outlines (thick gray cables), and connect them. One cable is in the middle, and the second is further south. Use the lantern to trace the power path.
- After connecting the cables, use Force Palm on the circular device in the east to restore the Crescent Skybridge of Crimson Desert and unlock the southern skybridge leading to the Crowcaller boss.
There is another skybridge to the north, but first you will need to defeat Crowcaller, and then solve the Monolith Crown Abyss puzzle to unlock it.
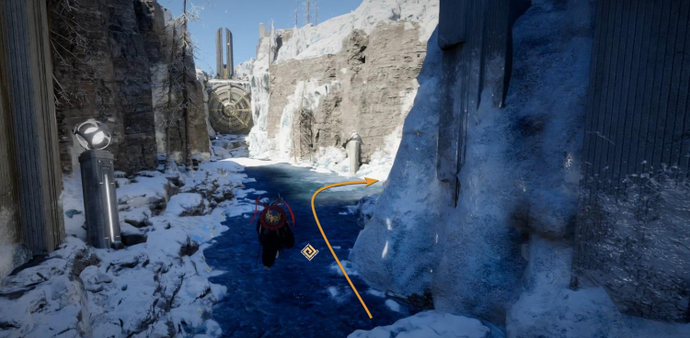
Ice Cradle Abyss — Solution
The Ice Cradle Abyss puzzle may seem complex, but it is quite simple once you understand what to do. Instructions for completing Ice Cradle:
- Climb the icy stairs to the right of the entrance, then descend the path into the cave system. Listen to the repeating sequence of musical notes that becomes louder as you move forward.
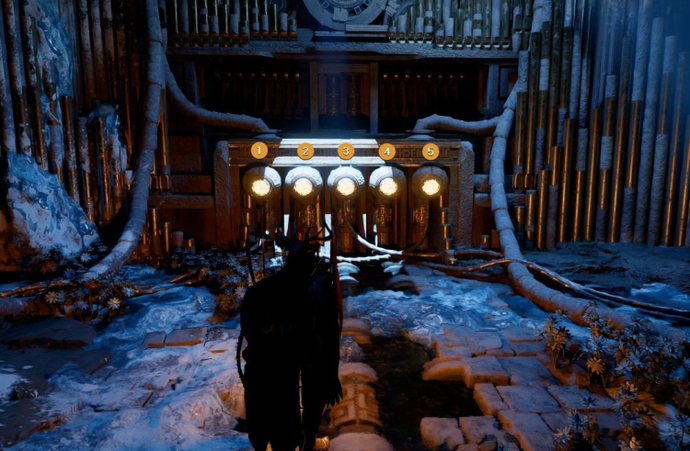
- Keep to the left while moving toward the music. In the puzzle chamber, you will find five yellow-white crystals connected to pipelines, numbered from left to right from 1 to 5.
- Use Blinding Flash to activate the crystals in the order of the notes played by the machine. The correct order is: 5-1-2-3-4-5-1-1. After entering the correct sequence, exit the chamber and climb up the pipe to the south-east.
- Using Axiom Force, take the blue stone block above the opening and carry it into the room to the west.
- Place the block vertically into the empty breaker-type socket above the plate.
- Stand on the plate and secure the block using Force Palm. It may take several attempts to place it correctly.
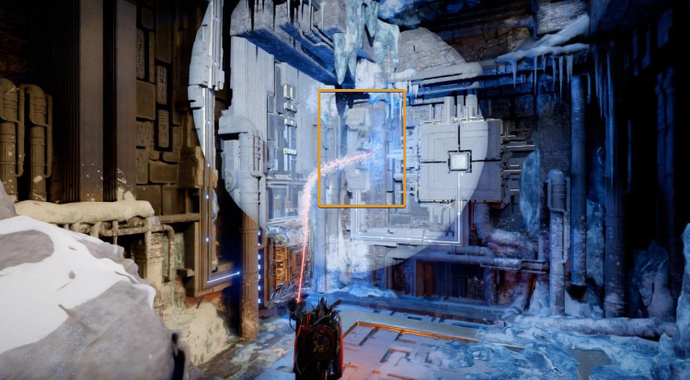
- Return to the starting area and connect the electrical line to activate the larger circular plate.
- Climb onto the large plate and activate it using Force Palm. After activating the final plate, the puzzle is complete, and you will receive an Abyss Artifact.

Ice Cradle is entered from the location Spire of Stars > Sanctorum of Insight > Secret Garden > Vault of Vengeance > Courtyard of Precision > Altar of Solitude. It is part of The Path of Providence cluster.
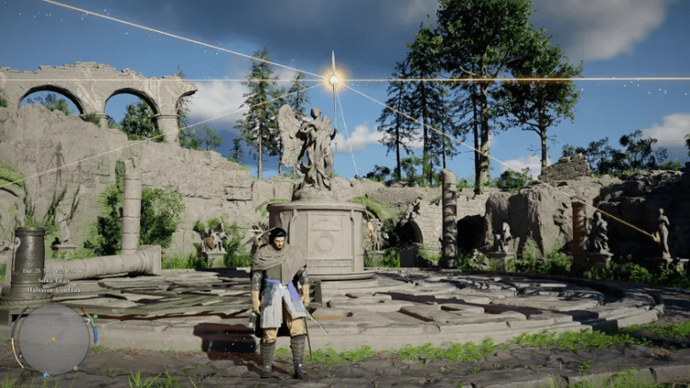
Halssius Conflux Ruins — Guide
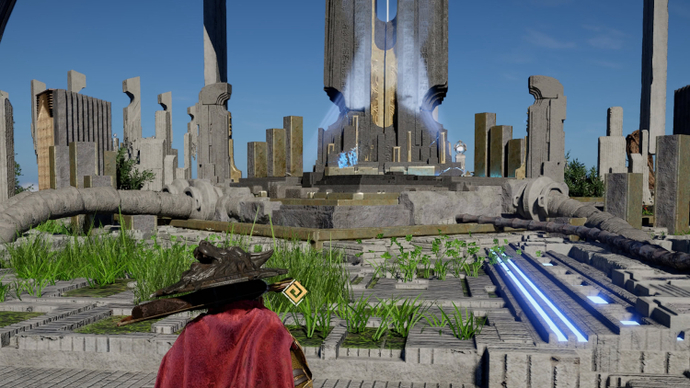
Halssius Conflux is a classic Ruins-type location. It features a large number of moving parts in the puzzle, but remains relatively simple. The Halssius Conflux Ruins are located approximately 1500 meters south-east of the city of Hernand and about 200 meters south-east of the House of Healing of Saint Halssius.
Travel along the road south from the city of Hernand, but do not cross the hill leading to the Hernand Highlands. Instead, turn east toward Anvil Hill and circle around it. Eventually, you will see the House of Healing in the distance, and the ruins are located to its south-east. To begin the puzzle, run onto the circular grid surrounding the central statue and column.
- Adjust the beam so that it points at the golden shield.
- Move the black pylon and the outlines attached to it so that the outlines surround the correct set of symbols within the circular grid.
- Start by moving the pylon so that the lower outline surrounds the shield symbol. This will realign the grid, adding a second set of symbols. You will need to repeat this process three times. Here is the sequence you need to follow.
Step 1: Golden Shield
Step 2: Scales, Wine Jug, Lyre
Step 3: Horse, Shield, Horse, Wine Jug, Scales, Lyre
After selecting all required symbols, the central column will open, and you will be able to obtain an Abyss Cresset for solving the Halssius Conflux Ruins puzzle.
Chaos Forest Puzzle — Solution
Chaos Forest is a natural labyrinth with hidden energy nodes. It requires attention and use of the map.

The Abyss gate appears when you ascend the Spire of Insight (but only if you are playing as Kliff), and it throws you directly in front of the Chaos Forest in the Abyss. Arriving here also activates a fast travel point, allowing you to return at any time or use it as a puzzle reset method. To complete the Chaos Forest Puzzle, follow these instructions:
- Use Blinding Light to burn the branches blocking the path in front of the wheels.
- Using Axiom Force, move the floating square from the central platform into the pool near the entrance, cool it in the water, then insert it into the square slot using Force Punch, rotating the second wheel.
- Jump across the gap and follow the gray wire. On the left, find the door with golden lining and lift it using Nature's Fin.
- Take the square and attach it to the panel on the wall using Axiom Force and Force Current (or Force Punch). Prop the door open to allow electricity to pass to the external panel.
- Pass through the propped door and activate the circular device using Axiom Force and Force Current (or Force Punch). Fly up to the Abyss Artifact and collect it.

- Move west through the triangular gate and use Axiom Force on the small column, rotating it to blue. Cross the moving platforms while coordinating speed.
Once you complete the entire path, you will unlock the Abyss Nexus. This is the only reward for completing this puzzle.
Toward the Nest — How To Activate The Skybridge
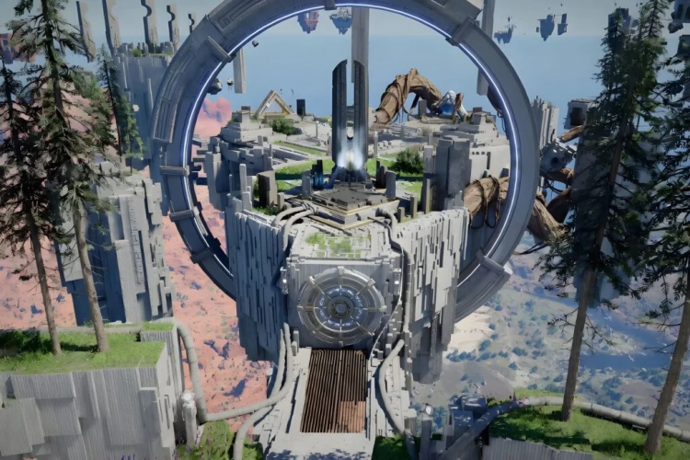
First, you will need to climb the Spire of Soaring, located in the northern part of the Demeniss region, solving several relatively simple puzzles along the way. However, the real difficulty begins once you arrive at the Abyss itself and need to activate the skybridge.
To activate the Skybridge, you need to turn on all the lights from the circular spheres on the wall panels, then repair two broken cables on the other side. This will cause energy to flow to the wall at the end — strike it once using Force Palm. After that, the Skybridge can be activated. Active cables are marked in blue, while inactive ones are yellow and must be reconnected.
- Climb to the upper ring above you, where you will find three spherical devices firing lasers across the gap: center, left, and right.
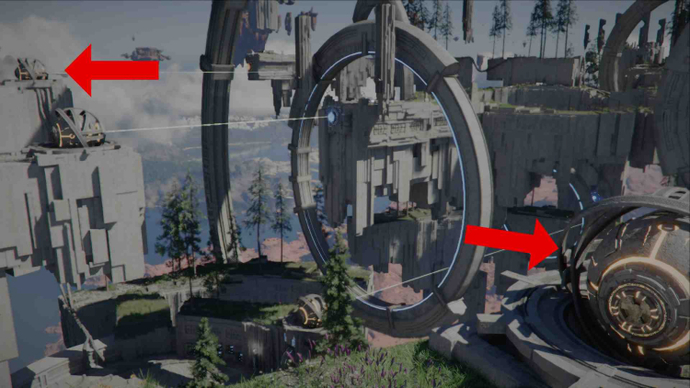
- The left and right ones are misaligned, so use Axiom Force on the back of each to control them, then move the laser so it hits the blue crystal opposite.
- Move to the other side and attach the two connecting pipes that will activate the large circular switch — one is located behind the central blue crystal, and the second is on the cable behind the right one.
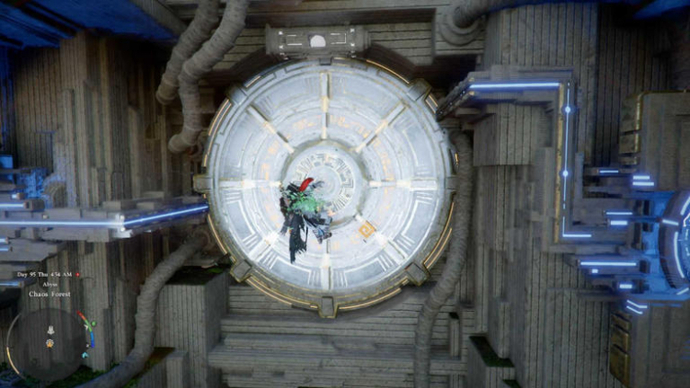
- Now climb onto the large disk that will light up and press it to activate it.
You can now continue chasing Crowcaller across the Abyss.
To defeat the Crowcaller Boss, you need to destroy his three health bars. With each phase, he becomes more aggressive, and the best strategy is to counter his attacks using L1 and perform quick combo attacks, rinse and repeat. It is strongly recommended to bring plenty of food, especially roasted meat, so you can constantly heal. You also need a high-quality Shield and S-tier Gear to deal a lot of damage With this strategy, you have the highest chances of winning and completing the Toward the Nest quest.
What You Unlock — Elements and Rewards Table
Sanctum/ Abyss | Element Unlocked | Reward |
Sanctum of Benediction | Light | Benediction Core, Axiom Force & Kuku Pot, Leather Helm of the Fallen Kingdom |
Sanctum of Absolution | Dark | Absolution Core, Enhanced Kuku Pot, Kuku Spear, The Vessel of Dark Pursuit |
Azure Moon Labyrinth | Moon | Abyss Artifact, Abyss Cresset, Memory of Tide (unlocks 8 hidden caves) |
Screaming Vault Ancient Ruins | Sound | Screaming Vault Artifact, Patterned Wheels Reward |
Crescent Skybridge Abyss | Air | Skybridge Activation Key, access to Crowcaller encounter |
Ice Cradle Abyss | Ice | Abyss Artifact, Blue Stone Block, Ice Cradle Artifact |
Halssius Conflux Ruins | Conflux | Abyss Cresset, Gold Shield Symbol Activation |
Chaos Forest | Chaos | Abyss Nexus |
Toward the Nest | Sky | Skybridge activated |
By using Best Skills and this equipment, you will be able to easily defeat challenging opponents.
Final Thoughts
All Sanctum and Abyss puzzles in Crimson Desert are built around clear logic that can be mastered after the first few trials. Once you understand how the CORE Puzzle Mechanic works, you will be able to handle even the most difficult quests. It is important not to rush and to carefully follow our tips to correctly place the blocks. Fully completing all Sanctums will unlock valuable rewards and allow you to progress further along the storyline.

Ostapchuk Dmytro – writer at EGamersWorld, ESports & Gaming Specialist
Dmytro started working at EGamersWorld in 2024 as a writer and later became a blog editor. His main focus is on esports disciplines Dota 2 and CS2. His tasks include finding topics that interest EGamersWorld readers and covering game updates, their features, and major esports tournaments.
Dmytro has recently begun working in this field, so he is learning a lot and making noticeable progress in this direction.


 Roblox Build a Zoo Codes April 2026Discover all working Roblox Build a Zoo codes - redeem for Gems, Lucky Tickets and Free Rewards.
 Crimson Desert Best Shields - Ranked List and How to Get S-Tier GearA complete guide to the best shields in Crimson Desert. Compare base stats, learn about unique bonuses, and find out where to obtain top-tier defensive gear for your character.
 How to Get Rhonid Large Shield in Crimson DesertLooking for the Rhonid Large Shield? Follow our Crimson Desert guide to sneak into Lioncrest Manor and grab this unique shield for high defense and mobility.
 LCK CUP 2026 Round 1-2: Complete Team Tier ListDiscover the ultimate power rankings for LCK Cup 2026 Rounds 1-2. See where Gen.G, T1, and other Korean teams place in our detailed tier list as they battle for a spot at MSI.
") Barça eSports07.04.2611:00Bo3
Barça eSports07.04.2611:00Bo3") Otakar EsportsWatch match
Otakar EsportsWatch match