Clair Obscur: Expedition 33 Tint Guide: How to Get All Tint Upgrades (Shards & Shapes)
")
In Clair Obscur: Expedition 33, Tint upgrades play a crucial role in surviving the game’s more challenging stages. By enhancing the Healing, Energy, and Revive Tints, you’ll be able to restore health, replenish energy, and revive your allies more effectively. To strengthen these abilities, you’ll need to collect special items — Shards and Shapes — scattered throughout the world. Below, I’ll explain in detail where you can find each of them.
Healing Tint Shards
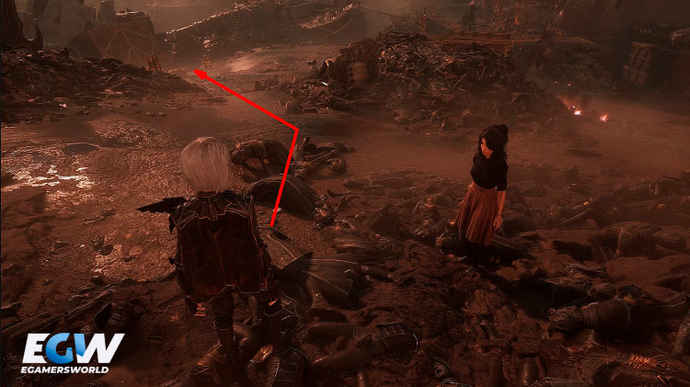
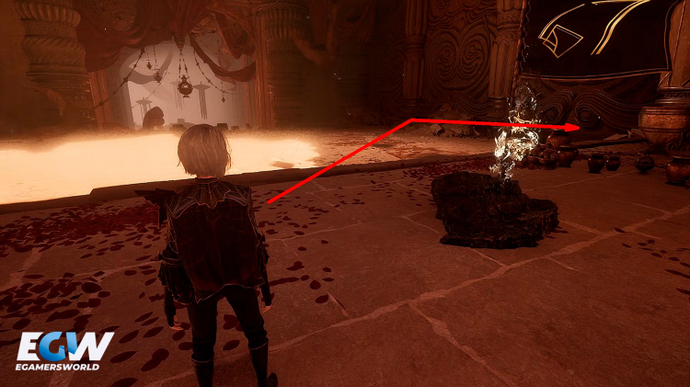
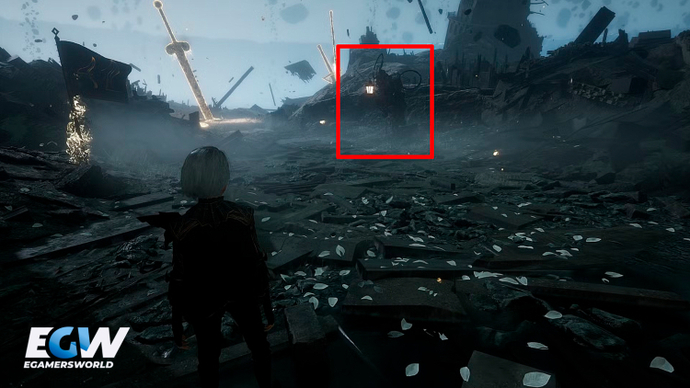
The first Healing Tint Shard is located in the Spring Meadows area, with the starting point at the Abandoned Expeditioner Camp. From the expedition flag, follow the path to the left, cross the bridge, descend the ramp, and pick up the purple item on the ground — this is the Resin. After that, return to the NPC named Jar (he’s standing just before the flag), give him the Resin, then shoot his torch using Free Aim. After speaking with him again, you’ll receive the first Healing Tint Shard.
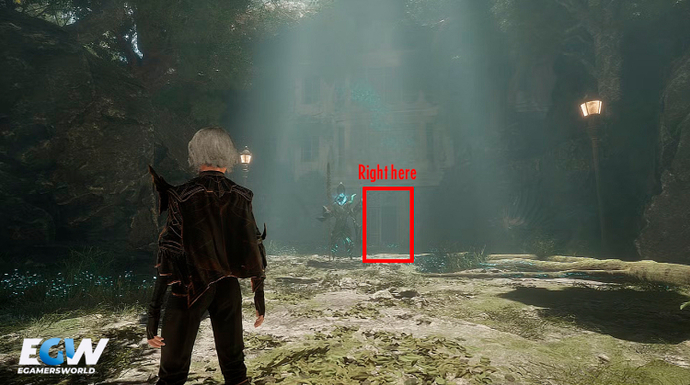
The second Healing Tint Shard is hidden in the Ancient Sanctuary, near the Sanctuary Maze expedition flag. After passing the flag, choose the left path at the fork. When you see the blue statues, keep moving forward and stay to the right at the next split. You’ll reach an area with a domed building and a large Robust Sakapatate. There’s a path on the left, and a small alcove on the right where the shard is located.
You’ll find the third Healing Tint Shard in Stone Wave Cliffs, near the Paintress Shrine expedition flag. From the flag, immediately head to the left. In a small hidden area, you’ll find the shard lying on the ground.
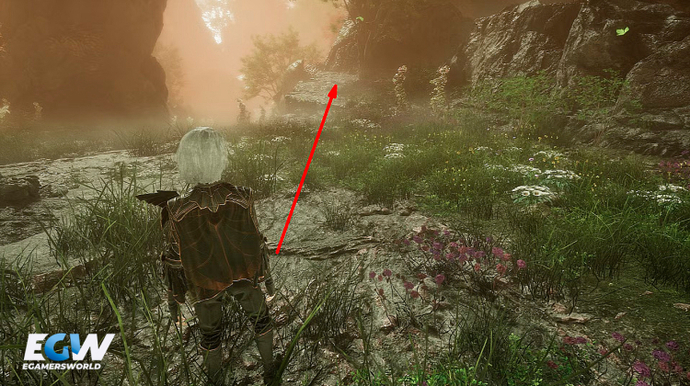
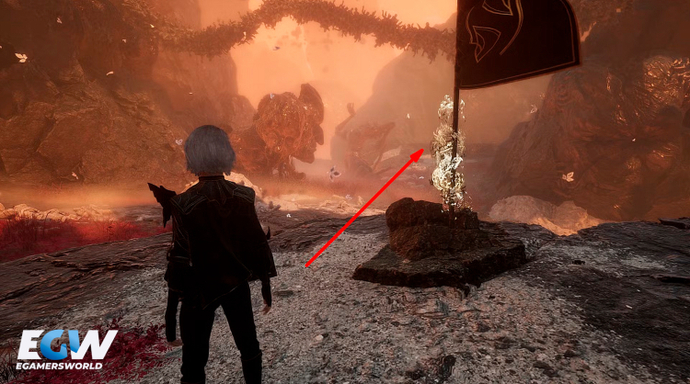
The fourth Healing Tint Shard is located on the Forgotten Battlefield map, near the Main Gate expedition flag. Move forward from the flag, then turn left at the first fork, and left again at the next split. Continue along the path until you reach a staircase, climb up, defeat the three Nevrons, and you’ll find the shard lying on the ground just before the wooden bridge.

The fifth Healing Tint Shard can be found in Visages, near the Joy Vale expedition flag. Right after the flag, head up the ramp on the right and enter the first corridor on the right — the shard will be inside.
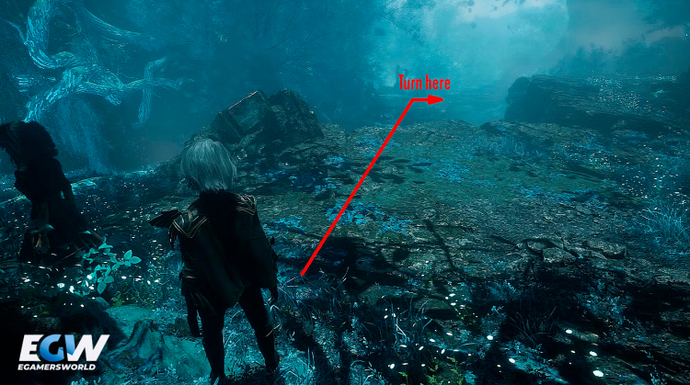
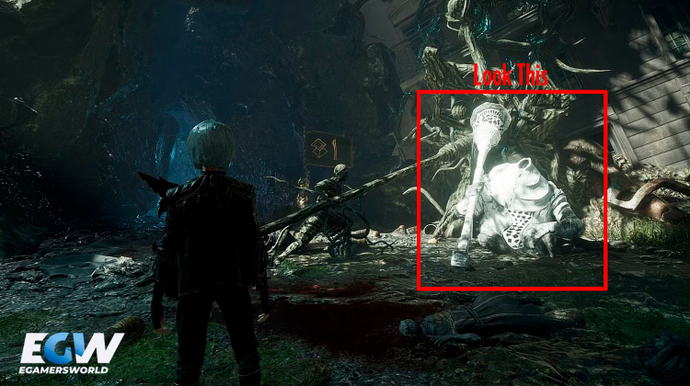
The sixth Healing Tint Shard is located inside the Monolith, starting from the Tainted Hearts expedition flag. Cross the bridge beyond the flag and turn left into a hidden area where a large Nevron stands. To the right of the enemy, there are climbing handholds. Climb up, and you’ll find a merchant at the top who sells this shard.
Shape of Health
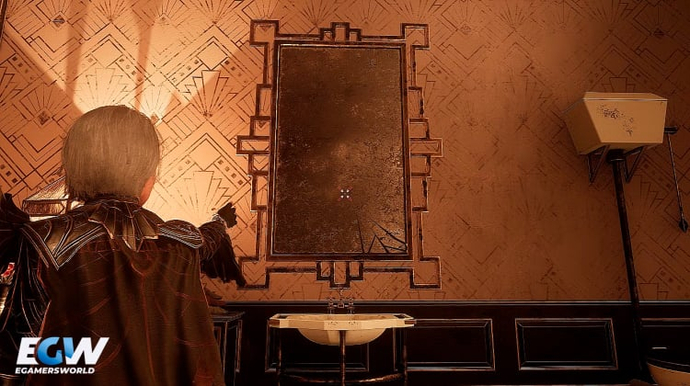
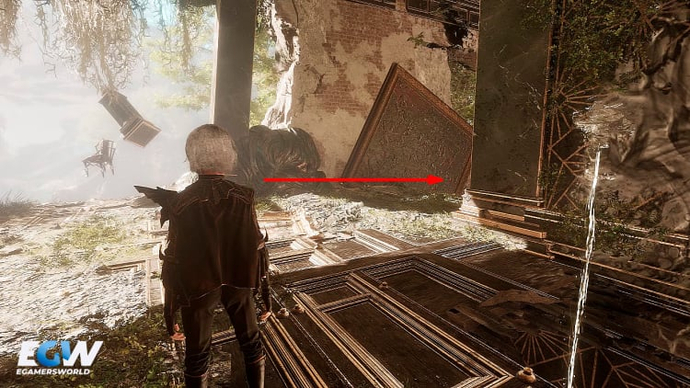
To fully upgrade the Healing Tint, you need to collect the Shape of Health. The first Shape can be obtained by defeating the boss on the Flying Waters map while following the path from the Flower Field expedition flag. The second Shape is located in Sirene, after starting at the Dancing Classes flag. Proceed through the vertical room with fabric walkways, ride the lift upward, and enter the Manor to the right. Break the mirror above the sink, pass through the hidden wall, and collect the Shape inside.
Energy Tint Shards
The first Energy Tint Shard can be found in Spring Meadows, near the Meadow Corridor expedition flag. Follow the main path, enter the building, climb to the upper level, and turn right after ascending the golden thread. The shard will be there.
The second Energy Tint Shard is waiting for you in Flying Waters, beyond the Lumieran Street expedition flag. At the far end of the area, there’s a large enemy guarding the shard. Defeat it and claim the Energy Tint Shard.
The third Energy Tint Shard is hidden in the Ancient Sanctuary, in the final boss arena near the Giant Bell Alley expedition flag. Look for a small elevated area within the arena where the battle takes place — the shard will be there.

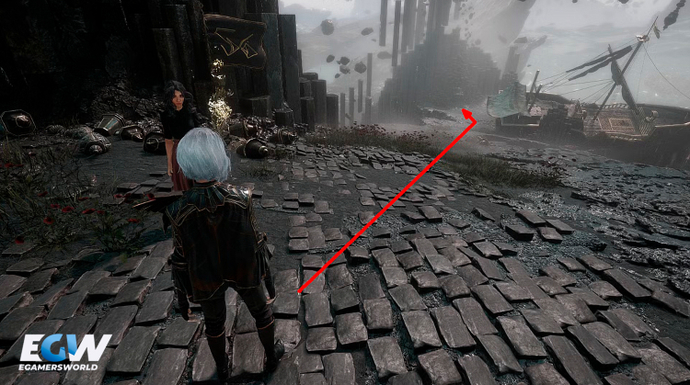
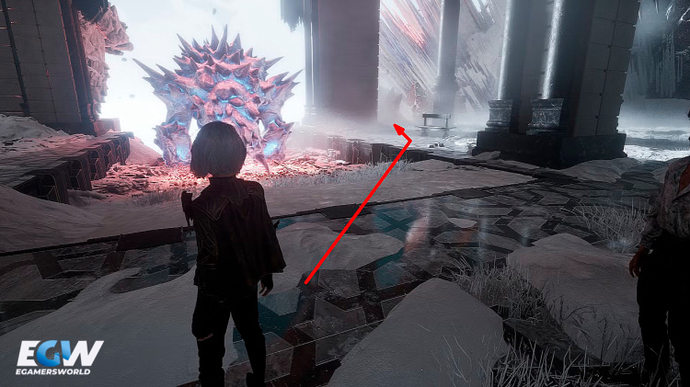
The fourth Energy Tint Shard is located in Stone Wave Cliffs, near the Paintress Shrine expedition flag. Head to the right from the flag and move slightly forward — the shard is lying on the ground near the boat.
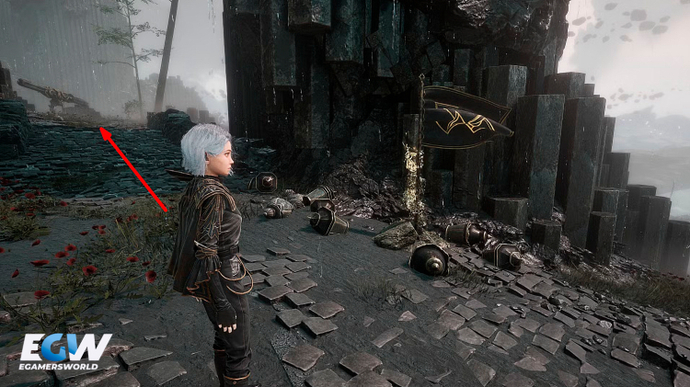
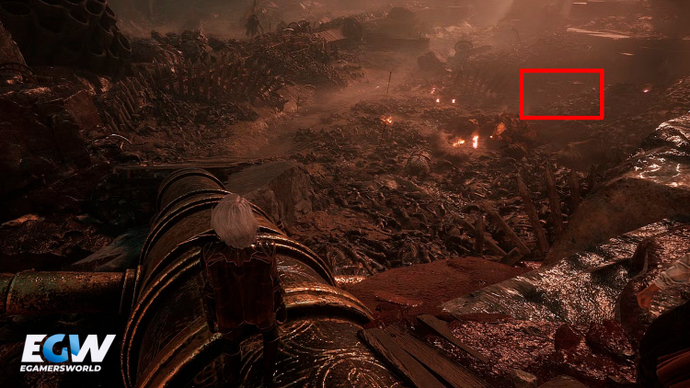
The fifth Energy Tint Shard can be obtained on the Forgotten Battlefield, near the Vanguard Point expedition flag. After sliding down the slanted cannon, look to the right and destroy the crates by the wall to reveal access to the shard.
The sixth Energy Tint Shard is hidden in Visages, near the Sadness Vale expedition flag. Right after entering the boss arena, turn 90 degrees to the right, climb a small slope, and you’ll find a group of Nevrons guarding the shard.
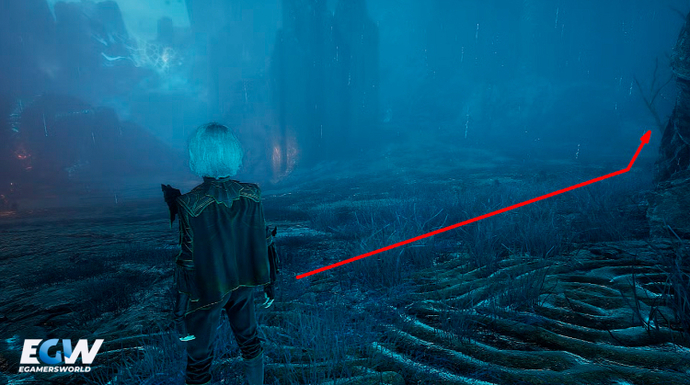
The seventh Energy Tint Shard is located in Sirene, near the Crumbling Path expedition flag. Right after the flag, head to the right — the shard is lying on the ground just before the descent along the golden thread.
Shape of Energy
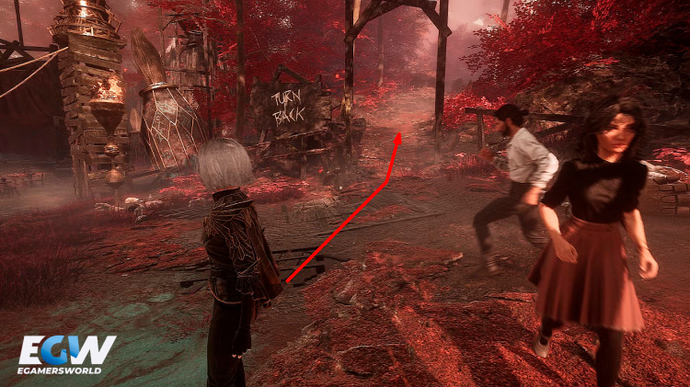
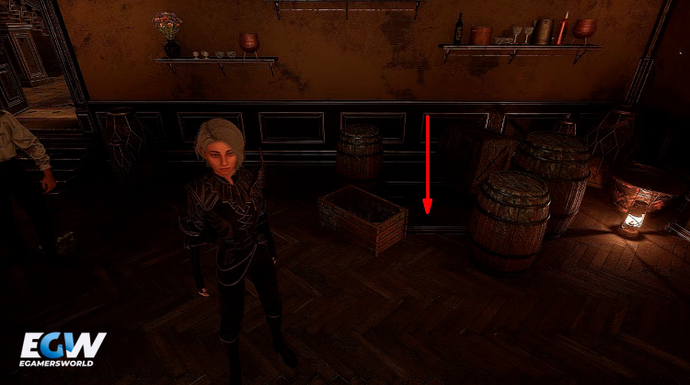
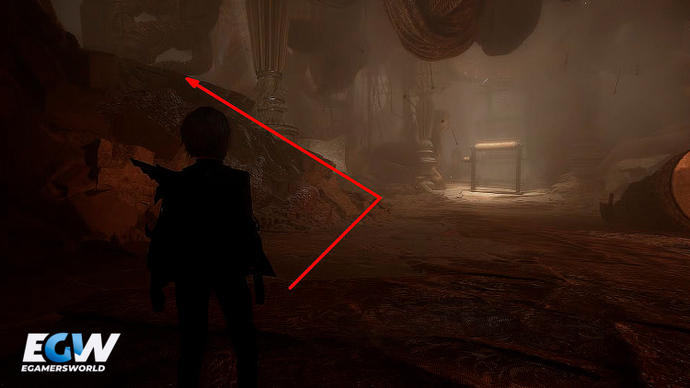
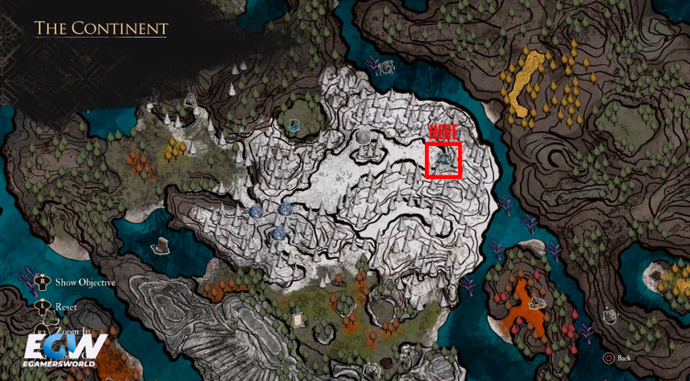
To fully upgrade the Energy Tint, you need to collect two Shapes. The first Shape of Energy is hidden in Gestral Village, inside the Manor behind the "Turn Back" sign. Inside, activate a hidden passage by interacting with a pan and a candle holder, descend into the lower level, and find the Shape among the stacked crates. The second one is located on The Continent. Enter the Manor on the island south of Blades' Graveyard, climb the spiral staircase, and jump across the platforms extending from the walls.
Revive Tint Shards
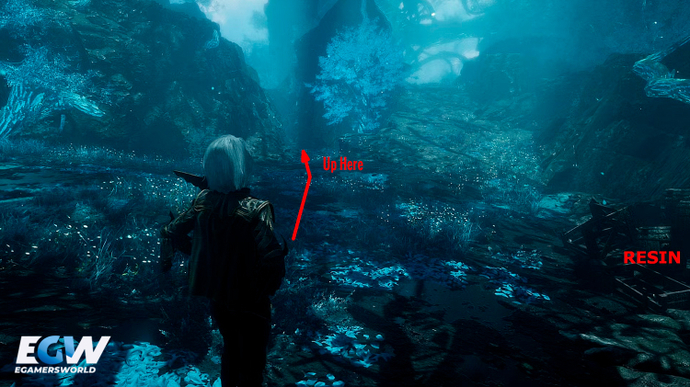
The first Revive Tint Shard can be picked up in Spring Meadows, near the Abandoned Expeditioner Camp, right after you obtain the Resin. Follow the path upward along the left edge of the slope.
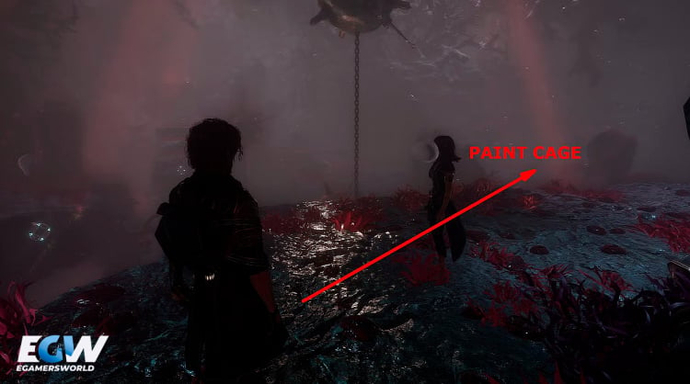
The second Revive Tint Shard is located in Flying Waters, beyond the Coral Cave expedition flag. Along the lantern-lined path, look for a hole on the right side. Beyond it, you’ll find a Paint Cage — break its locks to obtain the shard.
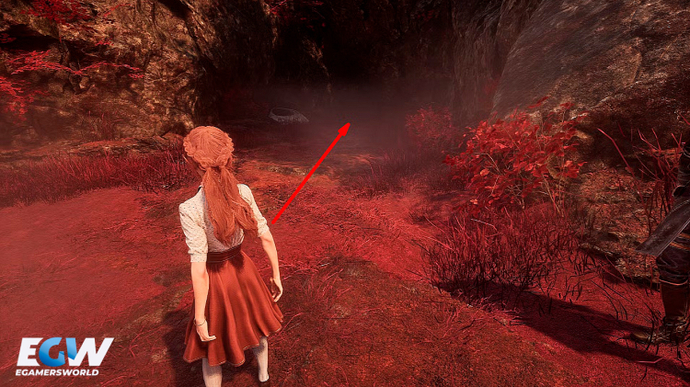
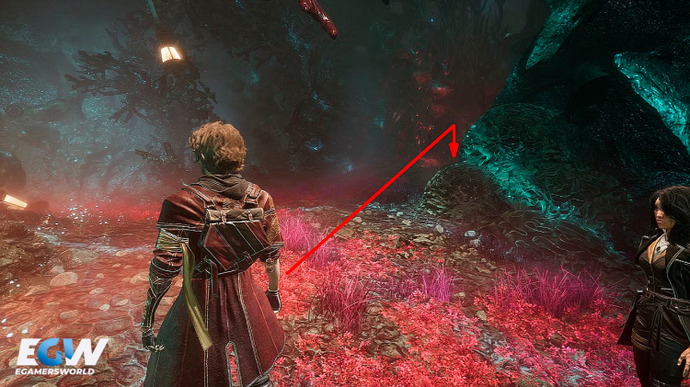
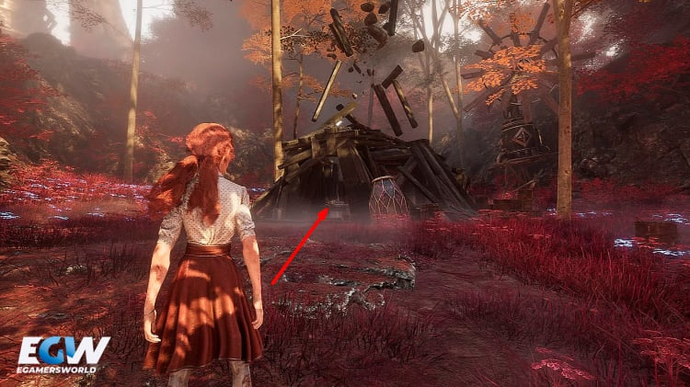
The third Revive Tint Shard is waiting for you in the Ancient Sanctuary, beyond the Sanctuary Maze expedition flag. After passing the flag, head to the right and look for a low passage on the right side. Crawl through it, and once outside, turn left toward an area with a wooden structure where the shard is hidden.
The fourth Revive Tint Shard is hidden in the Forgotten Battlefield, beyond the Main Gate expedition flag. Move forward, pass by the Nevron wielding a hammer, and descend the ramp on the left.
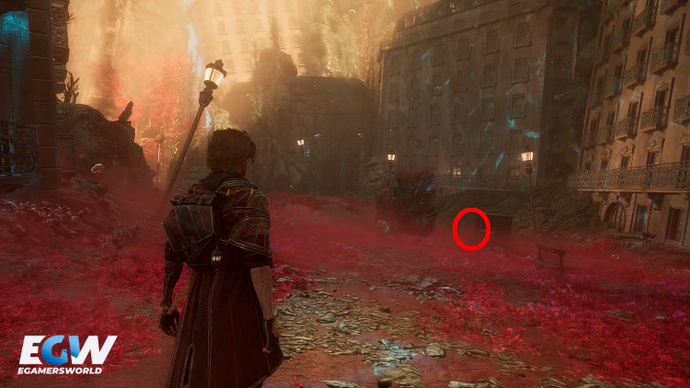
The fifth Revive Tint Shard is easy to obtain in Old Lumiere: near the Entrance expedition flag, a merchant sells the shard you need.
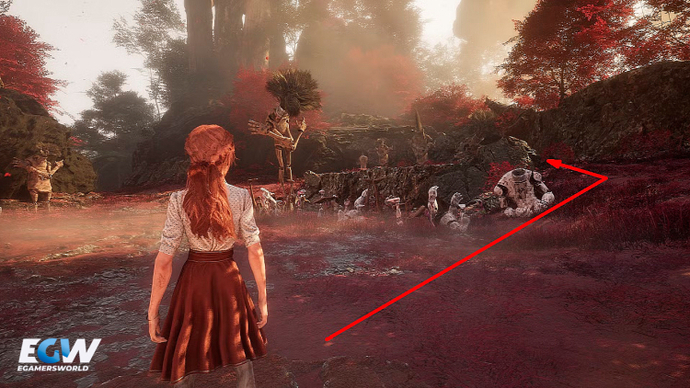
The sixth Revive Tint Shard is located in Visages, beyond the Anger Vale expedition flag. Walk straight ahead toward a group of Nevrons — the shard will be lying next to them.
The seventh Revive Tint Shard can be found in Sirene, after passing the Sewing Atelier. Enter the boss room, turn left, climb up the rubble, and shoot the locks of the Paint Cage from above.
The eighth Revive Tint Shard is hidden inside the Monolith, near the Tainted Meadows expedition flag. From the flag, move forward along the right side, descend two golden threads, and find the Paint Cage.

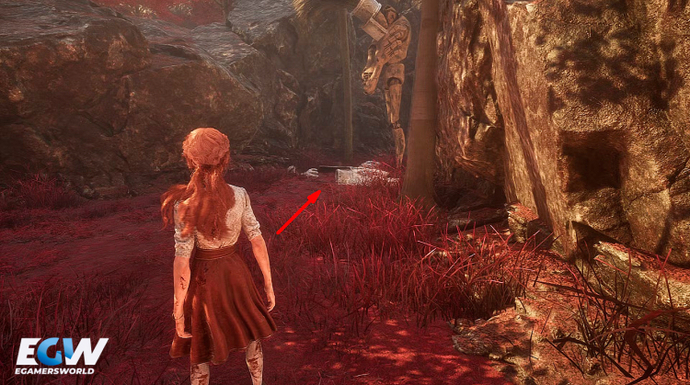
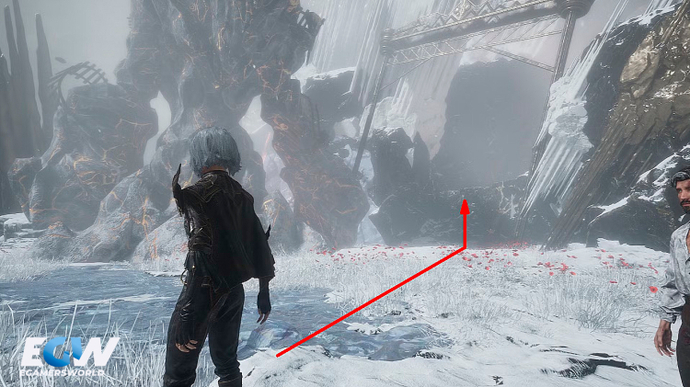
The ninth Revive Tint Shard is located in Frozen Hearts, near the Iced Heart expedition flag. From the flag, turn around, pass through the cave, and enter the first alcove on the right, where you’ll find a Paint Cage.
Shape of Life
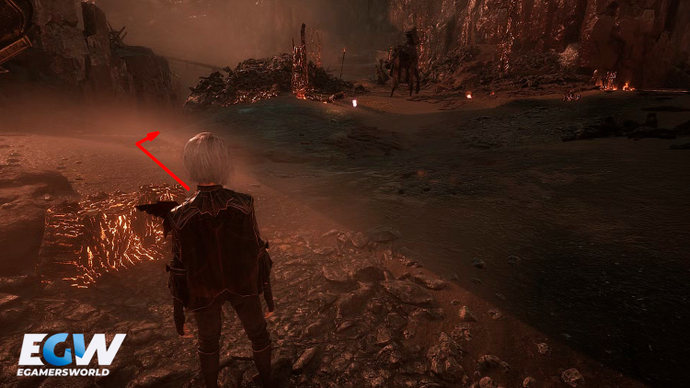
The final upgrade for the Revive Tint requires defeating the boss of the Stone Wave Cliffs map, starting from the Basalt Waves expedition flag.
Shards & Shapes — The Key to Victory
Tint upgrades in Clair Obscur: Expedition 33 play a crucial role in battles. Collecting Shards and Shapes is not just about strengthening your characters — it’s about creating real insurance for the most challenging stages of the game. In total, there are 22 Shards and 5 Shapes scattered across the world of Clair Obscur, and gathering them is essential for anyone planning to complete Expedition 33. Most fragments are hidden close to the main expedition flags, so being attentive and thoroughly exploring each area will definitely pay off.
Also, don’t forget to upgrade your weapons, as they play a significant role in progressing through the game. We’ve already published a full Clair Obscur: Expedition 33 Weapon Guide, where everything is explained in detail — make sure to check it out.
If you take your time and revisit locations to pick up any missed shards, you’ll significantly improve your chances of succeeding in the toughest fights. So stay sharp, take it slow, and most importantly — enjoy the game!

Kirill is a writer of articles and blogs at eGamersWorld, having joined the team in 2024. His primary focus is analytics and crafting content about esports. With years of experience in gaming, Kirill brings deep industry insights to deliver high-quality and engaging materials.


 Crimson Desert Dimensional Labyrinth Abyss Puzzle — Full Path and SolutionCrimson Desert's Dimensional Labyrinth Abyss puzzle requires Force Palm, Axiom cores, and four silver circles to solve.
 How to Enter Lioncrest Manor — Strongbox Puzzle Solution for Crimson DesertCrimson Desert's Lioncrest Manor requires a second-floor window climb — here's how to get inside.
 Everything we know about Samson: A Tyndalston StoryEverything we know about Samson: A Tyndalston Story — release date, gameplay, story, and features of Liquid Swords’ intense action game set in a harsh, unforgiving city.
 How to Solve All Sanctum Puzzles in Crimson DesertDiscover How to Solve All Sanctum Puzzles in Crimson Desert — Full Guide to Sanctums, Core Mechanics, and Rewards.
")
")